T1ll13 robot step 2.2
very minor update, but great fun along the way....

As previous shared, I setup an RPi3 with ROS and was about to move into the coding of ROS nodes. Whilst that was okay...it involved me having to use Python and whilst I see it's really useful to use, it's not my native tongue. That is JavaScript...has been client & server-side since about 1998, so it's my go-to comfort first choice.
So rather than attempting to port everything in my head into Python and then into ROS nodes, I thought I would do what I needed to do: "to get it to work" and then I'd look at porting it over.
What did that require? Well, installing NodeJS and npm on the RPi3 for one. Dead easy and simple to do.
Oh, I forgot to say what it is/was I wanted to actually achieve! okay, I want to be able to SHOUT at T1ll13 and for her to always be listening via a microphone (no trigger "Alexa" or "Google" words for me), to convert that Speech to Text, then send that Text to a Chat-bot, receive a response from the Chat-bot as text and then convert that Text to Speech and then SPEAK the response back to me via the speakers.
Sounds simple enough......
Of course, I have an IBMBluemix Cloud account that provides me with Watson STT and TTS services - extremely simple and easy to setup. Once created, all you need are the service credentials.
There is also an SDK for most language available too.
I chose the Javascript SDK (for NodeJS usage). I say I chose, but don't think you have to download the SDK from github and do something with it. All you need to do is include reference to it in the package.json file of the NodeJS app and it'll get pulled down and placed under the node_modules folder. All you really need to know about it is: what are the API calls we need to make.
I did the usual and set off on a DuckDuckGo quest searching for other peoples code/attempts at doing this. That didn't really reveal anything all that useful...until I found:
https://github.com/watson-developer-cloud/raspberry-pi-speech-to-text
Which seemed great initially....and it even worked too. But and this is crucial, as it states it uses the OLD REST API calls, which is fine and I can say it does still work, but, I was really looking for something forward looking. Darn this "free code" for not doing exactly what I want it to... :-)
It was a good exposure though to the mechanism of using 'arecord' to capture the speech (as the RPi3 is running Ubuntu Mate linux it's already installed) and how to use the .pipe() command to stream the speech to the STT service rather than recording it to a file locally and then pushing that to the STT service.
I then attempted to mash things around and "upgrade" the code to use the new REST API calls....then, as is usual, I got distracted by work-work.
I then had some free time one evening, so I did a bit more DuckDuckGo searching, I was actually looking for something else and eventually stumbled over what I needed!
https://www.altoros.com/blog/smart-halloween-a-talking-pumpkin-created-with-ibm-watson-and-raspberry-pi/
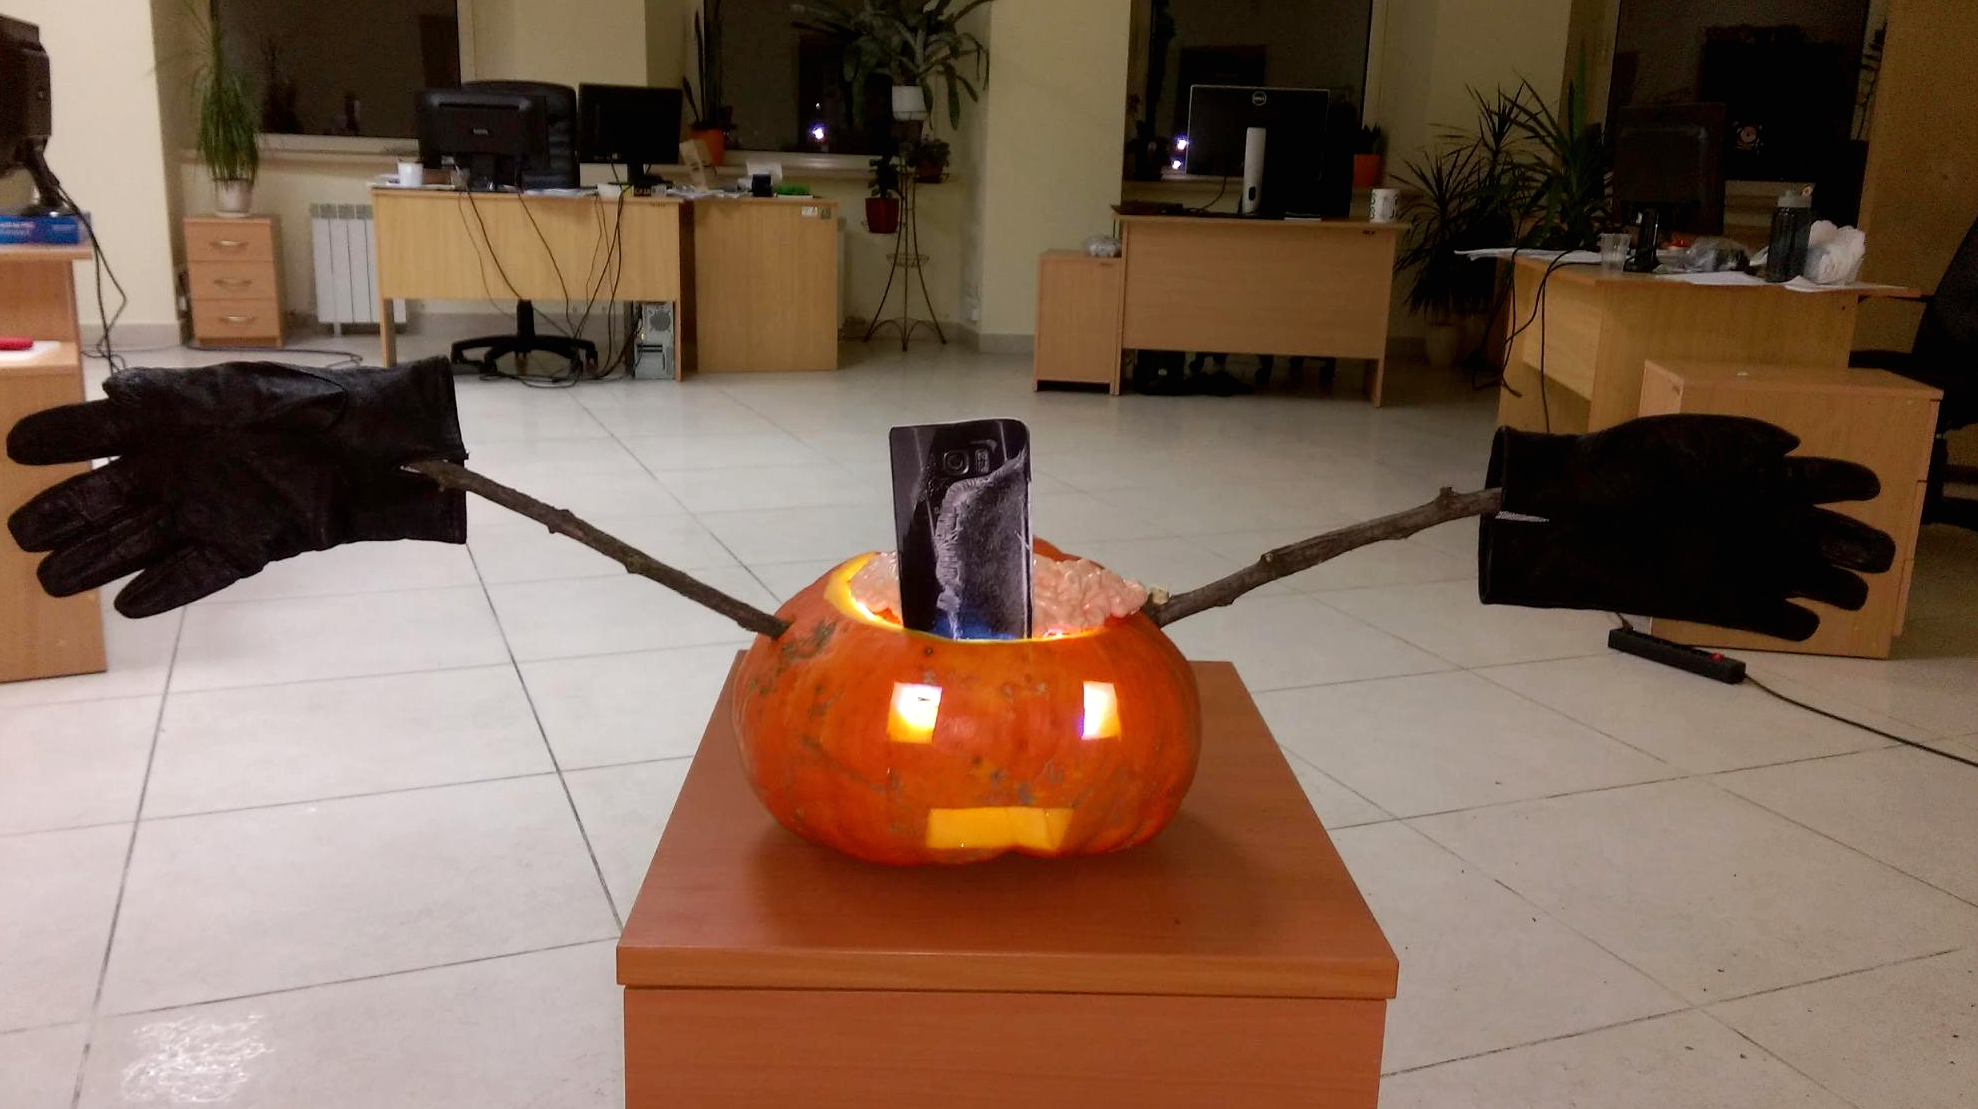
I confess, I lifted most of what they were originally doing - but, I did follow through and understood every step of what was happening, which pleasantly surprised me. I'll write a different article to go through the code in-depth as it is quite smart.
The one major change I made was to use the "dotenv" npm library to allow storing of the variable values for the STT and TTS into a .env file. Oh, and it uses SOX now instead of 'arecord'.


I also upgraded the usage of CleverBot to now use the latest npm library and API, that includes the 5000 free API calls APIKey.
In fact the JavaScript code itself is a really good explanation of adding callback()'s to your functions and passing back responses via the callback().
So, anyway, yes, after a bit of tweaking of the code, it would do exactly what I wanted it to do:
[listen to Mic]-->STT-->CleverBot-->TTS-->[Speaker output]
 I had a few experiments of attempting to re-use the little microphones that are still attached to the USB webcams in the robots eyes, but they just weren't good enough to pick much up. I also had a small USB microphone that plugged directly into the RPi3, but again, that proved to only work if you were about 3cm away from it. Not ideal.
Then I remembered that I ages ago, I purchased a USB connector that allowed a Mic & Speaker to be connected to it - also means I don't have to use the 3.5mm jack on the RPi3 anymore.

After a quick bit of setting up, this works great.

Okay, it's not perfect (yet), but at least it hears "most" of the words and I can hear it talking back to me as well as see the debug output.

Oh, yes, as mentioned in the pumpkin article, I am investigating forever as an option too.... even if not for this project.
Here's a little video of it working in action:
Of course, now that I've got the concept working, I'll switch out CleverBot for a Watson Conversation Service (WCS) as I was only using it to get something working and it does respond with a fair amount of gibberish.
I also now need to hookup the GPIO pins to the servo to open/close the mouth to match the "talking".
...and then have a "trigger word" to take a photo via the USB web camera eyes and then get that image sent to the Watson Visual Recognition service to determine what the robot thinks it did see and then trigger a conversation about that....

As previous shared, I setup an RPi3 with ROS and was about to move into the coding of ROS nodes. Whilst that was okay...it involved me having to use Python and whilst I see it's really useful to use, it's not my native tongue. That is JavaScript...has been client & server-side since about 1998, so it's my go-to comfort first choice.
So rather than attempting to port everything in my head into Python and then into ROS nodes, I thought I would do what I needed to do: "to get it to work" and then I'd look at porting it over.
What did that require? Well, installing NodeJS and npm on the RPi3 for one. Dead easy and simple to do.
Oh, I forgot to say what it is/was I wanted to actually achieve! okay, I want to be able to SHOUT at T1ll13 and for her to always be listening via a microphone (no trigger "Alexa" or "Google" words for me), to convert that Speech to Text, then send that Text to a Chat-bot, receive a response from the Chat-bot as text and then convert that Text to Speech and then SPEAK the response back to me via the speakers.
Sounds simple enough......
Of course, I have an IBM
There is also an SDK for most language available too.
I chose the Javascript SDK (for NodeJS usage). I say I chose, but don't think you have to download the SDK from github and do something with it. All you need to do is include reference to it in the package.json file of the NodeJS app and it'll get pulled down and placed under the node_modules folder. All you really need to know about it is: what are the API calls we need to make.
I did the usual and set off on a DuckDuckGo quest searching for other peoples code/attempts at doing this. That didn't really reveal anything all that useful...until I found:
https://github.com/watson-developer-cloud/raspberry-pi-speech-to-text
Which seemed great initially....and it even worked too. But and this is crucial, as it states it uses the OLD REST API calls, which is fine and I can say it does still work, but, I was really looking for something forward looking. Darn this "free code" for not doing exactly what I want it to... :-)
It was a good exposure though to the mechanism of using 'arecord' to capture the speech (as the RPi3 is running Ubuntu Mate linux it's already installed) and how to use the .pipe() command to stream the speech to the STT service rather than recording it to a file locally and then pushing that to the STT service.
I then attempted to mash things around and "upgrade" the code to use the new REST API calls....then, as is usual, I got distracted by work-work.
I then had some free time one evening, so I did a bit more DuckDuckGo searching, I was actually looking for something else and eventually stumbled over what I needed!
https://www.altoros.com/blog/smart-halloween-a-talking-pumpkin-created-with-ibm-watson-and-raspberry-pi/
I confess, I lifted most of what they were originally doing - but, I did follow through and understood every step of what was happening, which pleasantly surprised me. I'll write a different article to go through the code in-depth as it is quite smart.
The one major change I made was to use the "dotenv" npm library to allow storing of the variable values for the STT and TTS into a .env file. Oh, and it uses SOX now instead of 'arecord'.


I also upgraded the usage of CleverBot to now use the latest npm library and API, that includes the 5000 free API calls APIKey.
In fact the JavaScript code itself is a really good explanation of adding callback()'s to your functions and passing back responses via the callback().
So, anyway, yes, after a bit of tweaking of the code, it would do exactly what I wanted it to do:
[listen to Mic]-->STT-->CleverBot-->TTS-->[Speaker output]

Then I remembered that I ages ago, I purchased a USB connector that allowed a Mic & Speaker to be connected to it - also means I don't have to use the 3.5mm jack on the RPi3 anymore.

After a quick bit of setting up, this works great.

Okay, it's not perfect (yet), but at least it hears "most" of the words and I can hear it talking back to me as well as see the debug output.

Oh, yes, as mentioned in the pumpkin article, I am investigating forever as an option too.... even if not for this project.
Here's a little video of it working in action:
Of course, now that I've got the concept working, I'll switch out CleverBot for a Watson Conversation Service (WCS) as I was only using it to get something working and it does respond with a fair amount of gibberish.
I also now need to hookup the GPIO pins to the servo to open/close the mouth to match the "talking".
...and then have a "trigger word" to take a photo via the USB web camera eyes and then get that image sent to the Watson Visual Recognition service to determine what the robot thinks it did see and then trigger a conversation about that....


Comments
Post a Comment