MobileFirst Platform Server v7.1 running on a Raspberry Pi 2....
MobileFirst Platform Server v7.1 running on a Raspberry Pi 2....


1st - get a Raspberry Pi 2. Install Raspbian etc...etc... go into raspi-config and set it up to boot to console mode, we don't want to be messing about with all that GUI stuff now do we...
After a reboot, perform the following to make sure everything is up to date:
>sudo apt-get update
>sudo apt-get upgrade
You should already have Java installed within Raspbian, but if not
>sudo apt-get install oracle-java8-jdk
>java -version
java version "1.8.0"
Java(TM) SE Runtime Environment (build 1.8.0-b132)
2nd - download WebSphere Liberty Profile - I just happened to have a copy of the 2 .jar files on my Mac, so I re-used them, they are a little behind on version numbering, but they worked fine (v8.5.5.3)
>java -jar wlp-developers-runtime-8.5.5.3.jar
Accept the licence agreement and answer the questions and choose to install to /opt/IBM/wlp
>java -jar wlp-developers-extended-8.5.5.3.jar
Accept the licence agreement and answer the questions and choose to install to /opt/IBM/wlp
3rd - create a new WLP Server. Create the required folder and create a wlp server.
>cd /opt/IBM/wlp/bin
>./server create piServer
This creates a server under the /opt/IBM/wlp/usr/servers folder. That's the foundation of what we need to now put MFP into place.
Now, we have a couple of choices. We can attempt to install IBM Installation Manager on the Raspberry Pi and use the Command Line (imcl) to perform a silent installation of MFP....or, and the most sensible thing really, do this on a laptop (Mac or Windows). The installation of MFP is not really installing the software, it just creates a folder and lays down the binaries that you need to use inside the Java Application Server.

Now that's done we can move the files into the correct places inside WLP.
4th - ah, yes, we really need a database. So let's install MySQL. It's simple enough on the Pi.
>sudo apt-get install mysql-server --fix-warnings
When asked enter a password for the root account. It's all very quick and painless.
Then we should install the MySql client so we can run the scripts from the Pi.
>sudo apt-get install mysql-client
Connect to the MySql client and create the databases we need for MFP and the user account.
>sudo mysql -u root -h localhost -p password
mysql>create database WLADMIN;
mysql>create database WLRUNTIME1;
mysql>create database WLRUNTIME2;
mysql>create database APPCNTR;
mysql>create user 'wluser'@'localhost' identified by 'password';
mysql>grant all privileges on WLADMIN.* to 'wluser'@'localhost';
mysql>grant all privileges on WLRUNTIME1.* to 'wluser'@'localhost';
mysql>grant all privileges on WLRUNTIME2.* to 'wluser'@'localhost';
mysql>grant all privileges on APPCNTR.* to 'wluser'@'localhost';
mysql>flush privileges;
mysql>quit
Now, let's just double-check that we did that correctly:
>sudo mysql -u wluser -h localhost WLRUNTIME1 -p password
Now, as we are in the Runtime database, we need to create the "worklight" tables. I'm assuming that the folder you started the MySql client from contains the files you need (they are located within the /databases folder in the image above)
mysql>source create-worklight-mysql.sql
You should see the tables being created.
mysql>select * from WORKLIGHT_VERSION;
You should get a result with 1 row with a value of "7.1".
mysql>quit
>sudo mysql -u wluser -h localhost WLADMIN -p password
mysql>source create-worklightadmin-mysql.sql
You should see the tables being created.
mysql>quit
>sudo mysql -u wluser -h localhost APPCNTR -p password
The .sql file you need here is located in the /ApplicationCenter/databases folder)
mysql>source create-appcenter-mysql.sql
You should see the tables being created.
mysql>quit
That's it. We're done with the MySql databases and tables for MFP.
5th - back to WLP. Copy the following files to the following folder locations:
>worklightadmin.war
>worklightconsole.war
>/ApplicationCenter/console/appcenterconsole.war
>/ApplicationCenter/console/applicationcenter.war
/opt/IBM/wlp/usr/servers/piServer/apps
You'll also see that there is a server.xml file at this location
/opt/IBM/wlp/usr/servers/piServer/
The version there is the basic OOTB setup, you can delete that and replace it with the following:


You will also need to navigate to the following folder and create some lib folders that we reference in the server.xml file. You will also need to copy the relevant files shown into the right folders.
/opt/IBM/wlp/user/shared/resources/

For my runtime (that I named worklight), you can see that we need to create a worklight folder and the lib and mysql sub-folders and copy the parent files into them.
I had already downloaded and imported a sample application in relation to the AdapterAuth into my Eclipse development environment. In the /bin folder was the .war file that we need to copy to the Raspberry Pi.
/opt/IBM/wlp/usr/servers/piServer/apps
6th - start the Server
>cd /opt/IBM/wlp/usr/bin
>./server start piServer
Starting server piServer.
Server piServer started with process ID 2898.
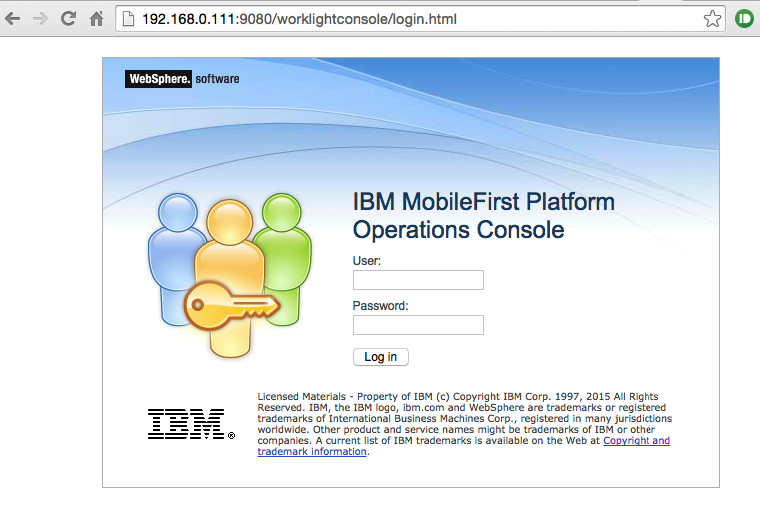
access the Worklight Console at the URL
>http://192.168.0.111:9080/worklightconsole
(and hopefully not see the 'No runtime environment deployed in this server' message!)
All looks good! Now, add the .wlapp and .adapter from my project and we should be in business!

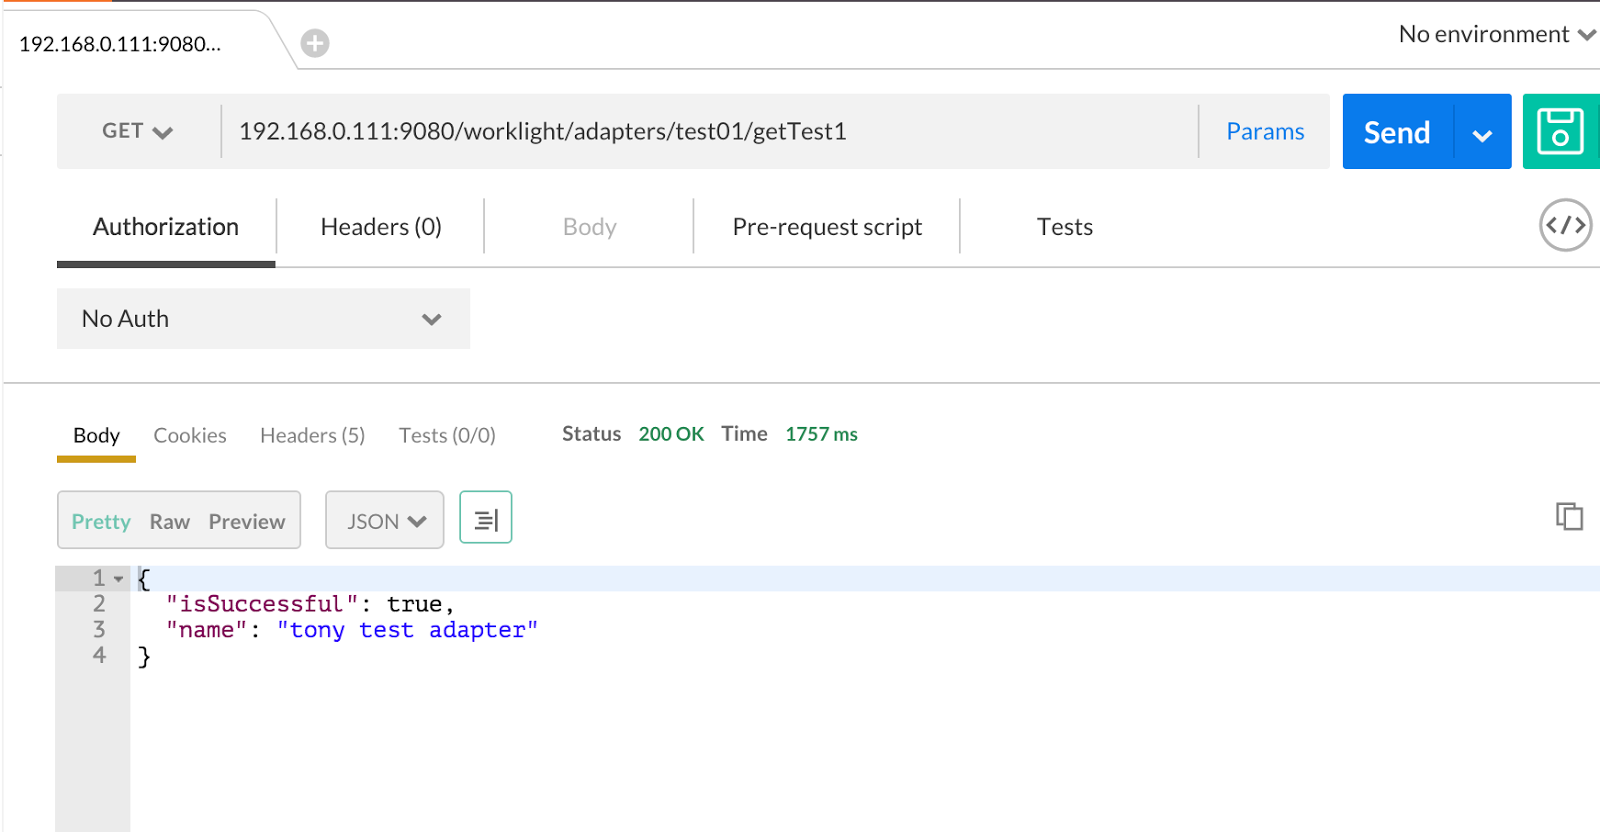
I have an adapter that I use to test calling from POSTMAN. I added it to the runtime and used POSTMAN to call the procedures within the Adapter.

The first procedure just returns some hard-coded text and the second procedure actually calls out to a REST API service I have running on Bluemix that fetches some data from a CloudantDB. Here's the output I get from POSTMAN when I call those two procedures inside my adapter:

7th - Oh, one last thing! The Application Center.... That is listening on a different URL
>http://192.168.0.111:9080/appcenterconsole/
login: appcenteradmin/admin
You can now add a new Application (just to prove it is all working as it should)

Well, there we have it, a Raspberry Pi 2 running a proper version of MobileFirst Platform Server v7.1, that functions and works exactly the same as if it were running on BIG WAS on a BIG Server costing a fortune for electricity.... and yes, I have the Pi setup so I can access it from the Internet too, so that Test AdapterAuth hybrid app I used earlier, yep, I can add it to the App Center, download it to my Phone, install it and run it and it'll all work properly.
How did it get to be 1am again? :-D


Comments
Post a Comment