Rotary phone, RPi5, STT & Ollama for an offline quirky assistant with TTS output - part 1

Did I say, "rotary phone?" Sure did. "What is one of those?" (top left in photo above)
Well, back in the day we had these odd things that we made phone calls from - yep, just phone calls. People used them to call other people, other people used phones to call them, it had a funky dial to select the numbers and a headset you picked up and put to the side of your head. It was great.
Anyway, I had a funky idea to re-purpose one of these device, hijack the microphone and the speaker of the headset, allow a person to speak a question that they want answered, pass that feed into a Raspberry Pi 5, convert the Speech to Text (using state of the art OpenAI Whisper - yes, OFFLINE!), then pass that into an LLM (powered by Ollama Engine running OFFLINE), then convert the response back to Speech, trigger the phone to basically make it RING! - person picks up the phone and the answer to their question is spoken back to them.
Funky huh? As an implementation pattern it does demonstrate a lot of integrations & is a great demonstrator, with a lot of re-use purposes & because I want it to be different I do NOT want to have any CLOUD in the equation, I want it to run self-contained BUT still offer all the benefits of the software capabilities. Okay, it might take a little longer to execute & run, but hey, it's not mission-critical and that's also where the novelty of ringing the phone when an answer is ready makes it more fun.
Right, so what did I do / am I doing (as, of course this is a work-in-progress)
Well, as usual there are a million and one things already "out there" that people have worked on / done stuff with & it's just a matter of being able to filter through them, find discrete components (lego blocks), put them into mental spaces and then figure out a way to pull them together and make something that works. With that in mind, I broke the challenge into an initial hardware & software problem.
I got onto a well known auction website (ebay) and ordered a variety of rotary dial phones - there are quite a few variants, some really old & easy to hack, some a bit more modern with semi-electronics that are more complex to hack and of course some obscure one's, like the army field telephone that I also purchased that, if I can hack it, will be awesome to have as an end result.
My objective:
Find a phone device that I can put a Raspberry Pi (or Arduino?) inside of it, to interface with the phone hardware. Detect when the handset has been lifted, there are 2 contacts that traditionally would have then triggered a "dialing tone", see if I can tap into that from the GPIO pins to detect when the handset has been lifted - that trigger will then start the code to start "streaming" or listening to the microphone, to pick up what the person is saying. Insert rules here about how long to record for, 5/10/30seconds? and also if there is silence for more than x seconds stop OR just keep recording until the person puts the headset back and trigger the contacts again. The above is a mix of hardware hacking and software.
After the above happens, it is then all software running on the Raspberry Pi, doing STT processing, invoking the LLM with a custom prompt template for brevity, then build a response in text. Convert that text into a voice / speech output that can then be played back to the person.
Then back to the hardware, again using the GPIO pins, trigger ringing the bell of the phone itself, there will have to be a little bit of "state management" to indicate that the bell is ringing and that the 2 contacts pointed out above are then triggered, that will indicate that we do not need to do the "listen" event here but the "play audio" event. Then the Raspberry Pi just plays the audio output to the person who can hear it from the headset speaker. They then put the headset down and job done.
Splitting that down further, that basically identifies that I need to go and find some code on the good old internet / github repo's / python libraries (euurrrgggggghhhhh - if I must) / blog posts, etc... to help achieve this.
Hardware:
I'll come back to this later, but it should be pretty simple, the rotary phone itself, a Raspberry Pi, some wires, soldering iron and a usb microphone that I can feed through the phone into the headset (might be simpler than attempting to re-use the existing microphone in the headset). I was pondering having a dedicated device to manage the phone itself, hence reference to Arduino UNO 4 earlier, but I think I can probably run it all from a single Raspberry Pi 5 device. I'll come back to this setup later.
Software:
For the CORE elements here, I basically need a STT engine that can run on a Raspberry Pi with the resource limitations that device itself presents.
I did find this library / tool that looked pretty handy: https://github.com/petewarden/spchcat
As the repo says, it's a thin wrapper around a few existing libraries that can do a LOT already - hey, the best coder is the best plagiarist, right?! why re-invent the wheel, if you don't have to.
Long story short, I went through a cycle with this that probably burnt far too much of my time - basically, the library is a little old (2-3 years) and the release versions will not run on my Raspberry Pi 5 that is running UBuntu 24. Basically, for once, I am too new! I was going to dig out a slower / older RPi as I have a full selection, but that would mean having multiple RPi's, which kind of put me off.
So, whilst it was a great idea...after far too long I decided to abandon this. I recall that I did stuff with PocketSphinx (way back when) and it still exists: https://github.com/cmusphinx/pocketsphinx
Again, went on an investigation detour for far too long... and then sat there thinking to myself, "surely in todays day & age, there should be some awesome new tool that can do this". Of course there is.
That is when I remembered that I did actually do something with this back in Sept '23, I installed OpenAI Whisper onto a server at work/work, but didn't really have time to test/use it. I pondered for a bit, hmmmm.... but did it still require a lot of compute/GPU to work?
Back to DuckDuckGo for a little bit of distraction. I do get asked a LOT, how do I think / how do I end up where I end up? Can I explain it, so other people can do the same? Well, obviously, unless you use the new Microsoft Recall on "me", I cannot share every 5seconds, but I'll attempt to explain a 50,000ft overview guide of how I went from A to B, via F & Q.
I stumbled over this repo:
https://github.com/vndee/local-talking-llm

It did show promise. However, as you scroll down, it did that thing that I don't really like. Yep, it had a LOT of Python dependencies. However, it did highlight that OpenAI Whisper was the way to go.

Hmmm....there is a LOT going on there. Maybe I should just bite the bullet and install Docker onto the Raspberry Pi 5, install Portainer (to easily manage the images/containers - yes, can use CLI, but hey) and then stick Whisper on inside a docker container.
..and what did that tell me? wHISper C++ :: that's what it led me to. Why didn't I start here?

This opens up so many more options. anyway, what did I actually do?
To test it, I just ran:
$ ./main -f samples/jfk.wav
The output to the CLI showed all the internal parameters etc... and then at the end the raw text that was converted from the .wav file. It was correct & took about 4 seconds.
$ ./main -h
gives a nice long list of all the [options] - this is very useful to step through.
I found that the "-otxt -ojf and --print-colors" options were going to be VERY USEFUL!
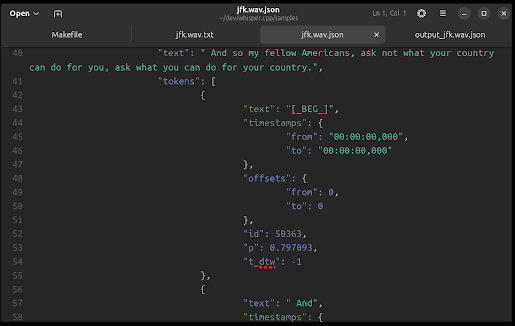
$ ./main -f samples/jfk.wav -m models/ggml-small.en.bin -ojf jfk.json

As you can see the text is output in the middle of that CLI debug output.
That takes the jfk.wav file, applies the small model and outputs a deep/complex JSON file that can then be read / parsed by some external software (hint!hint!)


Now, you'll notice within the samples folder there are .mp3 and .wav files, but the commands above all reference .wav files. Well, that is where the ffmpeg application comes into play. You can convert .mp3 files to .wav files like this:
$ cd samples
$ ffmpeg -i jfk.mp3 -ar 16000 -ac 1 -c:a pcm_s16le output_jfk.wav
That will convert the .mp3 to the required .wav format - I double-checked and it outputs the exact size of the original, so these settings were good to use with no loss.

As to the "--print-colors" option, well, that was just a nice CLI output visual, basically the words it has 100% confidence in are shown in green, less so in amber and less than that in red. It's a nice way to visually see how well the model is doing. Will need to investigate to see if I can get this data into the JSON output for parsing?

RIGHT! That is the TTS software sorted and running on the RPi 5 and doing a good job.
Simple steps next to do the Ollama LLM Engine installation - that is super simple:
$ sudo apt install curl (I would assume this & git were already installed, but just incase)
$ curl -fsSL https://ollama.com/install.sh | sh
Yeah - you can do it all manually, but I actually trust this repo, so more than happy to just run the .sh
Once installed,
$ ollama pull tinyllama
$ ollama pull gemma
$ ollama list
NAME ID SIZE MODIFIED
tinyllama:latest xxxxxxxxx 637 MB 15 hours ago
gemma:latest xxxxxxxxx 5 GB 1 minute ago
That then means that Ollama LLM Engine is no available on port 11434 running natively on the Raspberry Pi 5 as well.
What next? Oh, I should probably grab some screen shots for the above text - it's all a bit dry with far too much text. be right back. oh, you won't know I did that as the images will be in place when you read through, anyway.... brb...
Where to next? Time to tie the component pieces together, am also waiting on Amazon Prime to deliver 4 different usb microphones to see what would work best and fit within the handset. then to figure out how I want to code the communications between everything, I'm err-ing actually using Node-Red as there are RPi nodes for interacting with the GPIOs and the point of Node-Red is that it is event-driven, so that would work well, it can also do CLI command execution tasks that are needed as well as the REST API calls to the Ollama LLM Engine. That sounds like a no brainer to install next.
Then what? Well, then it's back to hardware interface time & figuring out how to trigger what and when and how.
Then take all the discrete components & plug them in together. Well, it is midday on a Sunday...so plenty of time left to make more progress today.
UPDATE : coming soon! - see PART 2 for follow up


Comments
Post a Comment